Are you ready to learn the secrets of beekeeping? Do you want to know how to conduct a successful hive inspection? Beekeeping can be both exciting and rewarding, but it also comes with its own set of challenges. Knowing what to do during an inspection is essential for keeping your bees healthy and happy. In this article, we’ll provide everything you need to know on conducting a safe and effective hive inspection.
Do you find yourself asking questions like: What kind of gear should I bring when inspecting my hives? How do I handle the honeybees that might sting me? Don’t worry – We’ve got all the answers! With our guide, you can easily navigate through every step of the process without putting yourself or your colony at risk.
No matter if you’re just starting out in beekeeping or are already experienced with caring for these amazing creatures – You won’t want to miss learning about how to properly inspect your hives! So let’s get started by diving deep into the world of beekeeping and exploring exactly how to conduct a safe and effective hive inspection.
Table of Contents
Definition
Beekeeping is an incredibly rewarding hobby, but it also requires a great deal of responsibility. Every beekeeper should be aware of best practices for conducting hive inspections and understand the purpose behind them. A hive inspection involves entering a beehive to check on the health of your bees, their resources, and any problems they may face.
Inspecting hives can help you monitor your colony’s progress over time and take proactive steps if necessary to protect them from disease or other threats. It’s important to remember that when opening a hive, you’re disrupting their home – so it’s essential to minimize disturbance as much as possible.

Keep in mind that both protective gear and appropriate tools are paramount when completing this task; without these two elements, you put yourself at risk of injury or harm.
Overall, with proper precautions taken before entering a hive, conducting regular inspections will provide valuable information while helping ensure optimal conditions for your honeybees’ survival.
With this knowledge comes the opportunity to make informed decisions about how to manage your apiary most effectively moving forward.
Purpose Of Hive Inspection
The purpose of a hive inspection is to ensure the health and productivity of your bees. It’s important to check on their progress regularly so that you can identify any potential problems before they become too severe. By conducting regular inspections, beekeepers are able to maintain healthy hives that produce quality honey and wax products.
During a hive inspection, it’s essential to look for signs of disease or pest infestation, as well as monitor the development of the colony. Checking for mites and other parasites will help keep your bees safe from harm.

Additionally, it’s important to make sure there are no obstructions in the way of ventilation or access points into the hive; this helps promote airflow for optimal living conditions.
Not only does a thorough hive inspection benefit the well-being of your colonies, but it also allows you to collect additional resources such as honey or pollen more efficiently by preventing overcrowding inside the beehive.
With minimal disruption, proper inspections provide plenty of benefits for both the beekeeper and their bees. Now let’s move on to discuss different types of hives available today.
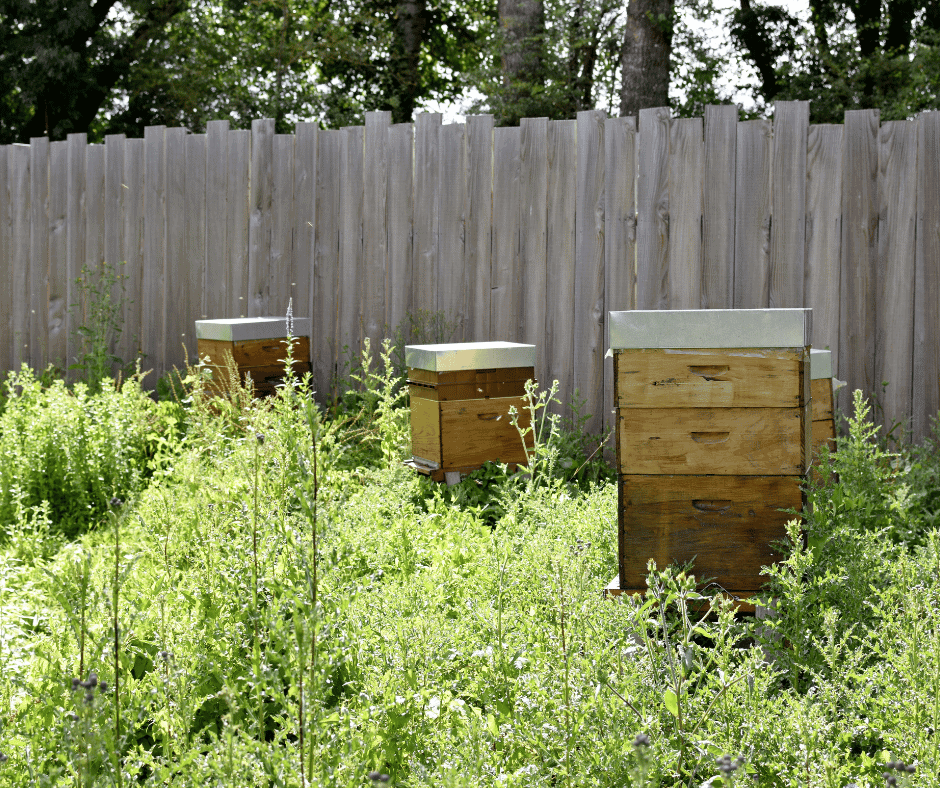
Types Of Hives
Transitioning from the previous section, if you are to understand how to inspect a hive, it is essential to know what kind of hives there are.
There are various types of beekeeping hives available on the market today: some as small and discreet as an upturned flowerpot, others that stretch up into the sky like skyscrapers! Each type has its own strengths and weaknesses:
Langstroth Hive

Advantages: Ease of use; standardization
Disadvantages: Low honey harvest per frame
Top Bar Hives

Advantages: Easy maintenance; low cost
Disadvantages: Difficult harvesting process
Warre Hive

Advantages: A more natural environment for bees
Disadvantages: Harder to monitor health/productivity levels
In selecting your hive, consider all these factors plus your budget—a properly designed and maintained system can make all the difference in successful beekeeping.
Furthermore, different types of hives may require different safety protocols when conducting inspections. As such, understanding which type you have will be essential in determining how best to protect yourself during inspection day.
Safety Protocols
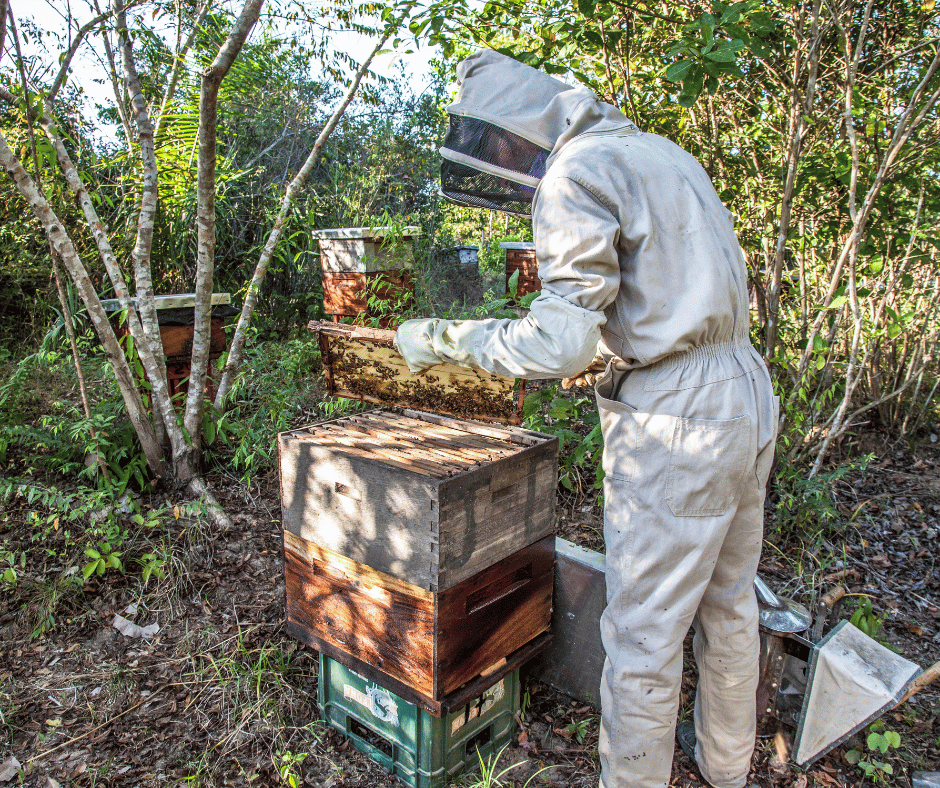
Beekeeping requires a level of caution and safety protocols to be observed at all times. Before conducting a hive inspection, the beekeeper should employ protective clothing and equipment to reduce potential risks associated with coming into contact with bees. Here is an overview of essential items for personal protection:
| Item | Purpose | Notes |
|---|---|---|
| Veil & Hat Combo or Jacket/Hat w/Veil Attached | Provides head covering from stings in enclosed areas; allows visibility when inspecting frames inside hives | Veils come in various sizes and styles; choose one that is comfortable and provides adequate coverage |
| Gloves | Protects hands from stings while handling frames or other parts of the hive; helps avoid skin irritation caused by propolis (bee glue) on frame surfaces | Choose gloves made out of leather, canvas, or synthetic material such as nitrile rubber; make sure they are thick enough to protect against stings but thin enough to handle frames properly |
| Vented Boots | Protection from accidental stings while walking around apiary sites; prevents legs from being scratched by plants surrounding the hives |
In addition to these protective items, it is important to maintain a calm demeanor during inspections. Bees may become agitated if disturbed too much or handled roughly. Respect their space and keep movements slow and deliberate. Allowing them time to adjust will reduce the risk of getting swarmed or attacked.
Knowledge about bee behavior can also help minimize any potential harm during inspections. With careful preparation and following good safety practices, beekeepers can maximize their chances of having successful honey harvests every season!
Now that we have discussed the necessary precautions for inspecting hives, let’s move on to discuss the tools and equipment needed for this task.
Necessary Tools And Equipment
Now that you have reviewed the safety protocols for beekeeping, it is time to move forward with the necessary tools and equipment for a hive inspection. To ensure your experience goes as smoothly as possible, here are five essential items you should always have on hand:
- A smoker – A smoker helps keep bees calm while being handled. It also masks alarm pheromones released by agitated bees which can trigger other colonies in the area to become aggressive.
- Protective clothing – Protective gear such as gloves and veils help protect against stings when inspecting an active hive.
- Frames and foundations – Frames provide support for the honeycomb within the hive, while foundations give structure and stability to comb cells used for storing nectar and pollen.
- Hive tool – This tool is useful for separating or opening hives during inspections. It’s also helpful for scraping away propolis from frames or removing burr combs between frames.
- Bee brush – A bee brush allows the gentle removal of bees from areas where they’re not wanted without causing injury or agitation.
Equipment like this will make sure any problems encountered can be addressed quickly and safely so you can get back to enjoying your hobby without delay! With all the necessary tools now gathered, we’re ready to start preparing the hive for inspection.
Preparing The Hive For Inspection
The key to a successful hive inspection is thorough preparation. Before entering the bee yard, it’s important to ensure that you have all of the necessary tools and protective gear on hand.
It’s also essential to check the weather forecast prior to your inspection; if there are high winds or rain present, it is best to reschedule so as not to agitate the colony. Once everything has been checked twice, it is time to proceed with inspecting the hive!

Your safety is paramount when conducting a hive inspection. Make sure that your veil and gloves fit securely, then take a few deep breaths in order to relax and focus before approaching the bee yard.
Taking this extra step allows for an enjoyable experience while protecting yourself from potential stings.
Ready? Now we can begin our journey into identifying the queen bee!
Identifying Queen Bee
Identifying the queen bee is an essential part of a hive inspection. She can be distinguished from other bees because she’s larger than them, and her wings are shorter. Her job is to lay eggs in each honeycomb cell as quickly as possible so that the colony continues to thrive and expand.
Before you start your search for the queen bee, it’s important to remember that she could be anywhere – even on one of the frames you haven’t inspected yet!

That said, there are some clues that can help narrow down where she might be located; look for patterns in the movement of worker bees or listen out for buzzing sounds that indicate they’re near her.
If you spot a large group of bees clustered together, chances are they may have surrounded their monarch.
You should also try to check every frame at least twice during your inspection since queens often move around during this process.
The last thing you want is to miss seeing her altogether! Once found, take note of any physical characteristics such as coloration that will help identify her if she ever needs replacing.
With these tips in mind, let’s turn our attention toward assessing how many worker bees we have in the hive…
Assessing the Number Of Bees
Once you’ve found the entrance to your hive, it’s time to assess how many bees are living in there. Here are some steps you can take to get an accurate count:
- Observe from a distance – Stand back and observe the activity around the hive for about 5-10 minutes. This will give you an idea of how active the colony is and what its population may be like inside.
- Listen carefully – Put your ear up against the side of the hive and listen closely. A healthy colony should produce a low humming sound that indicates they have enough members to keep things running smoothly. If you don’t hear this noise, then there might be fewer bees than necessary within the hive.
- Look through observation windows – Many beekeeping boxes come with built-in observation windows that allow you to peep into the inner workings of the hive without opening it up completely. Make sure to use these windows when assessing numbers as they provide a much more accurate picture than just guessing based on external signs alone.
These simple steps will help you determine whether or not your colony has enough members to sustain itself properly over time.
From here, we’ll move on to examining frames in the hive – taking note of any issues such as pests, diseases, or damaged comb along the way.
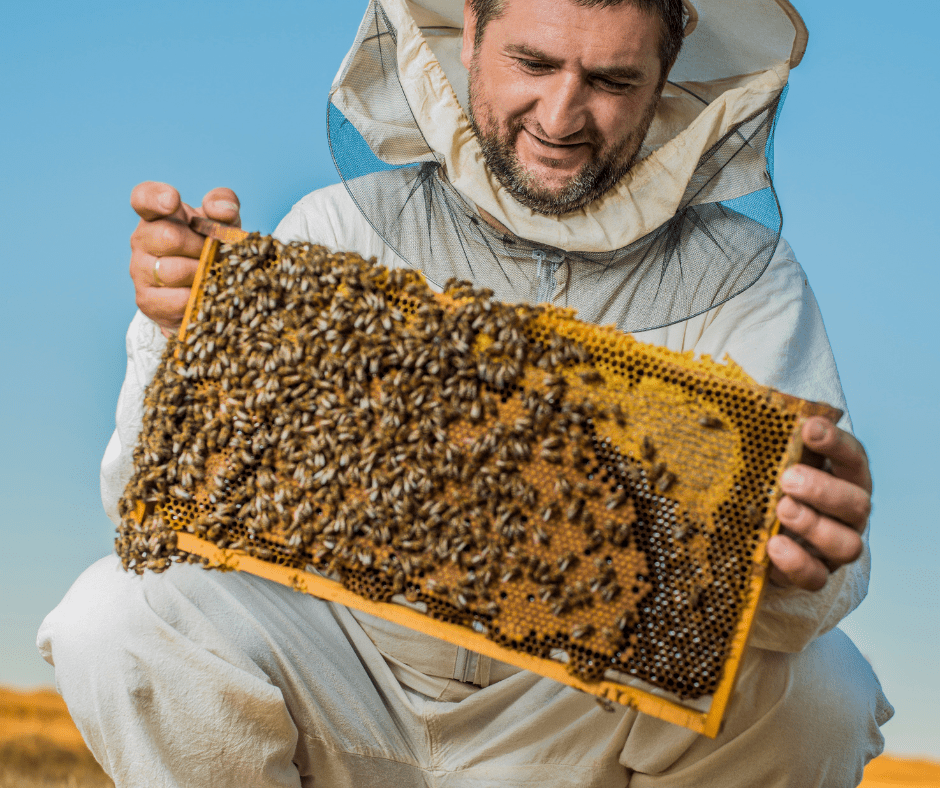
Examining Frames In The Hive
Now that the number of bees in your hive has been estimated, it’s time to get a closer look. Before you begin examining frames in the hive, make sure to suit up with protective gear and keep an eye out for signs of pests or diseases.

Begin by gently lifting the top box off of the lower one. Carefully remove each frame from the box and examine both sides closely.
Look for eggs, larvae, honeycomb cells filled with nectar, pollen stores, and queen cells as well as evidence of disease or pests like wax moths or varroa mites.
Pay close attention to any dark spots or discolorations on either side of the comb; these may be indicators of infection.
It is also important to ensure that there are no swarm cells present. If they are found, this could indicate that your colony is preparing to leave its current location and find a new home elsewhere!
Once all of the frames have been examined properly, put them back into their respective boxes and replace the top box with the bottom one. Make sure not to disturb too many bees while doing so–you don’t want them angry at you!
With everything set in place again, it’s time to move on to collecting honey samples for further analysis…
Collecting Honey Samples
Believe it or not, the average bee produces 1/12th of a teaspoon of honey in its lifetime! Collecting honey samples is a crucial part of hive inspection. To do this, start by donning protective gear and opening up the hive with your smoker.
With each frame, you remove, inspect for any bees that are still present and brush them gently away from the area. Take care to not damage the comb as doing so may interrupt the process of collecting honey.

Next, use a special beekeeper’s knife to cut out wax cappings from cells containing mature honey. Place these pieces into an unheated bowl or pot – be sure never to heat up the collected sample too much as overheating will cause some important enzymes to die off and affect the quality of your harvestable honey.
Lastly, strain off all debris like dead bees and propolis before pouring your finished product into jars for storage or sale.
The next step in inspecting your hives involves checking for diseases or parasites which can pose serious threats to both colonies and individual bees alike.
Checking For Diseases Or Parasites
Now that you’ve collected honey samples, it’s time to move on to inspecting your hive for diseases or parasites. These two things can be detrimental to the health of a bee colony and should not be overlooked during an inspection.
The first thing you’ll want to do is take a look at the bees themselves. Check if they have any visible signs of disease, such as discoloration, spots, mites, etc. If there are any signs that something isn’t right with them, then further investigation will need to be done.
You may also want to check the hives for dead bees; this could indicate a problem with the Queen Bee or other environmental issues within the hive itself.
Next, examine the wax comb inside the hive closely. Look out for anything unusual such as moldy patches or areas where there appears to have been an infestation of some kind.
Additionally, look around for any pests like beetles or wasps which could cause damage and disruption in the area surrounding your hive. Taking these steps now can help prevent problems from worsening later down the line.
By conducting a thorough examination of both your bees and their environment, you are taking proactive measures to ensure that your colony remains healthy over time.
Doing so will make sure that your hard work pays off in a successful harvest season! It’s important however to address any health issues found early on before they become bigger problems – we’ll discuss how best to resolve those shortly.
How To Complete a Disease Inspection Video
How To Resolve Health Issues Found
It’s time to address any health issues you may have found during the hive inspection. You can’t simply ignore them in hopes that they’ll go away; instead, it’s important to take proactive steps toward restoring balance and promoting bee health.
| Issue | Action Required | Benefits |
|---|---|---|
| Varroa Mites Detected | Treat with Oxalic Acid or Apiguard Treatment Strips | Reduce mite populations by up to 90% |
| Pests Found Inside Hive (Small Hive Beetles, Wax Moths) | Remove debris & replace wax comb if needed | Prevent the spread of pests inside your hives, reducing bee stress levels |
| Queen Issues (Laying Pattern/Disease Symptoms) | Replace the queen with a new one from a local breeder or requeen naturally using larvae from the frame within the hive | Reestablish healthy colonies quickly and easily; increase chances for success when introducing a new queen into the colony |
Taking these steps will help maintain a healthy environment for bees in your hives.
Additionally, keeping records of inspections and treatments prescribed is recommended as this helps us better understand our bees’ needs over time. Keeping notes also lets us track progress throughout the seasons – something very useful in understanding how different variables affect honey production and overall hive productivity.
The more we know about what works best for our bees, the more productive our efforts become!
With careful monitoring and regular maintenance checks of your beehive(s), you are on your way to becoming an effective beekeeper who understands their charges well enough to intervene whenever necessary while still allowing natural processes to flourish.
Now let’s look at ways to maintain the hive after the inspection so that it remains vibrant and healthy all season long.
Maintaining The Hive After Inspection
After completing a hive inspection, it’s important to take the necessary steps to maintain your hive. This ensures that all of the components are in good condition and functioning properly. Here’s what you need to do:
- Put back the frames into their correct positions inside the hive body. Make sure they are fastened securely so there is no risk of them falling out or being damaged during transport.
- Replace any broken parts or equipment as soon as possible to avoid further damage and disruption to the colony’s operations.
- Re-attach or replace any protective covers over openings on top of the hive body that may have been removed for access during the inspection. It will help protect against predators and keep away curious animals from entering the hive while also preventing moisture buildup inside which could encourage mold growth.
By following these steps after each inspection, you can be confident that your hives remain healthy and well taken care of without having to worry about potential problems down the line due to negligence or improper maintenance procedures.
With this peace of mind, you can now move on to recording data from inspections – an essential step in beekeeping!
Recording Data From Inspections
Having completed the inspection, it is now essential to record your findings. This step serves two main purposes: first, it helps you remember and review important details; second, it allows for continuous monitoring of the hive’s progress over time.
To ensure these goals are met, here are some tips for effective recordings.
When recording data from inspections, start by noting the date when they were conducted. It is also helpful to include a reference photo taken at that same point in time so that future observations can be compared against one another.
Additionally, take note of any changes or discrepancies observed during each visit such as new queen cells being constructed or honey frames with high pollen content levels.
Also, consider jotting down comments about overall health and activity within the colony since this will provide useful information regarding the environment’s changing conditions throughout the year.
Finally, make sure to keep accurate records of all bee products harvested from the hive and store them securely outside of its vicinity. By taking these steps you will have comprehensive notes on hand which can aid in better understanding how external factors may be impacting your bees’ behavior and development over time.
With appropriate tracking and analysis methods in place, beekeepers can more effectively manage their hives for optimal performance going forward.
Recap of Tips For Effective Inspections
Inspecting a beehive is an important part of beekeeping. This process allows you to check for signs of health, measure the progress of your hive, and address any issues in their living environment. To ensure that inspections are conducted properly and safely, let’s review the tips here.
The first thing to do before inspecting your hive is to make sure your protective clothing and equipment are all in good condition. Wear long sleeves, pants, a hat with a veil or mesh netting, gloves, and boots when handling bees – even if you’re experienced!
Make sure everything fits snugly so as not to allow any gaps for bees to enter. Additionally, inspect your smoker for proper use prior to entering the area. The smoke will help keep the bees calm during inspection without harming them.
Once you’ve completed these preparations, it’s time for the actual inspection! Start by removing each frame one at a time from the box; it’s best practice to start on the outside frames since they’ll most likely contain honeycomb and stored food supplies rather than eggs or larvae which may require more delicate movements.
As you assess each frame individually, look out for larvae development stages that indicate colony growth rate, healthy levels of pollen stores (to feed younger members), and other signs such as mites or diseases that could endanger the hive population.
When finished with each frame place it back carefully into its original position – never shake off excess bees while doing this as it can cause injury or death! After completing this step take note of any changes between previous visits and discuss those findings with fellow beekeepers who may have insights about what action should be taken next.
By following these simple steps every time you conduct an inspection you’ll help keep your beehives safe and healthy throughout their lifecycle! Your knowledge also helps protect native species from extinction due to habitat destruction caused by human activity.
With effective inspections comes peace of mind knowing that your hives are thriving just as nature intended them to!
Frequently Asked Questions
How Often Should A Hive Inspection Be Conducted?
How often should a hive inspection be conducted? This is an important question for beekeepers to consider. Regular inspections of the hives allow you to stay on top of any developing problems and can help keep your bee colony healthy. Here are 3 tips that will help ensure you’re doing enough hive inspections:
1) Inspect at least once every two weeks in the spring, summer, and fall months. During this time there may be rapid changes within the hive due to growth or disease, so it’s important to check up regularly.
2) Monitor activity around the entrance of the hive. If bees appear restless or agitated, do a closer inspection as soon as possible – something might be amiss inside!
3) Don’t forget about winter checks too! While bees tend to slow down during colder weather, it doesn’t mean they don’t need looking after either. Check for condensation build-up inside the hive which could indicate larger issues such as mold or pests.
Taking all these points into account should help make sure your colonies remain strong throughout their lifespan. It also gives peace of mind knowing that all potential hazards have been addressed before they become serious issues.
Beekeeping takes dedication but with regular inspections, you can enjoy a rewarding experience while keeping your colony safe and sound.
Is Beekeeping An Expensive Hobby?
Beekeeping can be likened to a roller coaster ride – it has its ups and downs but is an exciting experience that’s worth the effort.
The question of whether or not beekeeping is an expensive hobby comes up for many potential newcomers. It may seem like a daunting prospect at first, however, there are several ways to keep costs in check:
- Research what equipment you need beforehand so you don’t buy items that aren’t necessary
- Buy used materials when possible
- Take advantage of local resources such as classes or mentorships to save on costs
- Start small by focusing on one hive before expanding your collection
The amount of money put into beekeeping will depend largely on how involved you want to become with the craft. If you only plan to dabble occasionally, then the cost could be minimal, however, if you plan to make it more than just a hobby then expenses can start adding up quickly. Just remember that investing in quality materials upfront will help reduce long-term maintenance costs.
It takes dedication and commitment to properly care for bees, regardless of budget size. Always take safety precautions and learn from experienced beekeepers whenever possible; these tips combined with careful planning will ensure that you get the most out of your beekeeping journey without breaking the bank!
What Is The Best Time Of Year To Inspect A Hive?
Inspecting a bee hive is an important part of the beekeeping process. Knowing when to conduct this inspection can mean the difference between successful and failed colonies, so it’s essential that you get it right! But what is the best time of year for this task?
When considering when to inspect a beehive, there are two main factors to consider: seasonality and colony size.
Seasonally speaking, late spring or early summer is generally considered the ideal time because bees have already had some chance to build up their populations and honey production has not yet begun in earnest. This makes it easier to assess the overall health of the hive without disrupting too much activity.
Additionally, inspecting during these times allows you to catch any signs of disease before they become widespread throughout the colony.
On top of seasonal timing, you’ll also need to factor in your particular colony’s size.
If your hives are quite large then conducting multiple inspections within one season may be necessary; however, if your hives are smaller then just one thorough inspection should suffice for the entire period.
The key here is balance — you don’t want to do too little but at the same time you don’t want to disrupt natural processes by overdoing it either!
Ultimately, careful consideration should go into determining when exactly you will perform each hive inspection. Doing so with both seasonality and colony size in mind will help ensure that all colonies remain healthy while still avoiding disruption as much as possible.
What Is The Expected Lifespan Of A Queen Bee?
Queen bees are the most important part of a beekeeping colony. They have an incredibly long lifespan compared to other bees in the hive and play a vital role in producing offspring for many years. But just how long do queen bees live?
On average, queen bees can typically live up to five years:
- A newly-emerged queen may survive up to three years;
- An older or well-established queen has been known to live as long as five years;
- Some lucky queens have even lived beyond six years!
The age of the queen is one factor that affects her life expectancy, but so does the quality of care she receives from her keepers. Queen bees’ diets should be rich in essential nutrients such as protein, carbohydrates, minerals, and vitamins.
Additionally, they need proper ventilation and humidity management within their hives. If all these conditions are met, then it’s possible for them to reach their full potential lifespan.
It’s also important to remember that queens reproduce with drones throughout their lifetime – this helps maintain genetic diversity and ensure healthy colonies over time.
To sum up, while there is no guarantee on how long a specific individual will live if provided with adequate environment and care, the expected lifespan of a queen bee ranges between 3-6 years depending on several factors like diet and genetics.
Are There Special Regulations Or Permits Required To Keep Bees In Certain Areas?
The question of whether special regulations or permits are required to keep bees in certain areas is a vital one and needs to be examined before embarking on your beekeeping journey.
It’s an important part of the process, as it will ensure you stay within legal boundaries while providing the best environment for your buzzing friends. Like weaving a tapestry, there are several intricate details that must fit together perfectly for everything to go smoothly.
To start off with, it’s key to note that most countries have different rules and restrictions when it comes to keeping bees.
From registration requirements to specific guidelines about hive placement and inspection frequency, understanding local laws surrounding beekeeping can save you from some major headaches down the line.
To help get started, here’s a quick list of things you should consider:
- Check if there is any local legislation restricting beekeeping activities
- Determine if a license is necessary to practice beekeeping in the area
- Investigate what kind of equipment may need registering
- Get familiar with all relevant health and safety standards
It’s worth noting that these regulations can vary greatly depending on where you live so make sure you do thorough research beforehand.
Additionally, check out resources like Bee Culture Magazine which provide valuable information regarding local ordinances and other useful tips aimed at helping new beekeepers navigate their way through this complex yet exciting hobby! D
oing all this upfront work will give them peace of mind knowing they’re doing everything correctly according to their local government regulations.
Conclusion
Beekeeping is an incredibly rewarding hobby, and a hive inspection is essential for the health of your bees. Inspections need to be completed regularly in order to ensure that everything is working correctly within the hive.
It’s important to understand all regulations or permits required before beginning beekeeping in certain areas, as well as the expected lifespan of queen bees.
Inspecting hives can be time-consuming but it pays off when you’re able to witness the magnificent beauty of thousands of honeybees hard at work building their home.
I’m always amazed by how quickly they build wax cells, storing away nectar collected from nearby flowers and plants.
Seeing them fly around with determination brings me so much joy; there’s nothing quite like witnessing nature’s ingenuity firsthand!
Overall, beekeeping requires dedication and knowledge in order to succeed. After all, we owe these little creatures more than just our admiration; they help feed us through pollination and give us delicious honey too!
So if you’re thinking about starting this fascinating journey into beekeeping, make sure you take some time to do a thorough inspection of your hives every now and then – your bees will thank you for it!